Category: Hardware

  • Lenovo Thinkpad X260

    Lenovo Thinkpad X260

    As the ‘first-call’, ‘boots-on-the-ground’ IT administrator for the family of companies I work for I need a dependable and flexible laptop.

    My Dell XPS 12 (2012) has served that role competently since I purchased it at launch. It’s tablet-like functionality is pretty nice in quickly navigating through many tasks. Then you have normal laptop input when more nuance is needed. Where it eventually fell short is not having a built-in Ethernet port, forcing me to use awkward dongles. Boy those get old after a while. It was also very top-heavy as a laptop, and even on a flat surface wanted to tip backwards. And on top of all that, the Ivy Bridge processor was just not as power efficient as I would like especially with the ground that Haswell and Skylake gained in that arena.

    Dude…you’re replacing a Dell!

    So the time came for an upgrade. My criteria were very simple:

    • Generic laptop/notebook form-factor. No hybrids or convertibles.
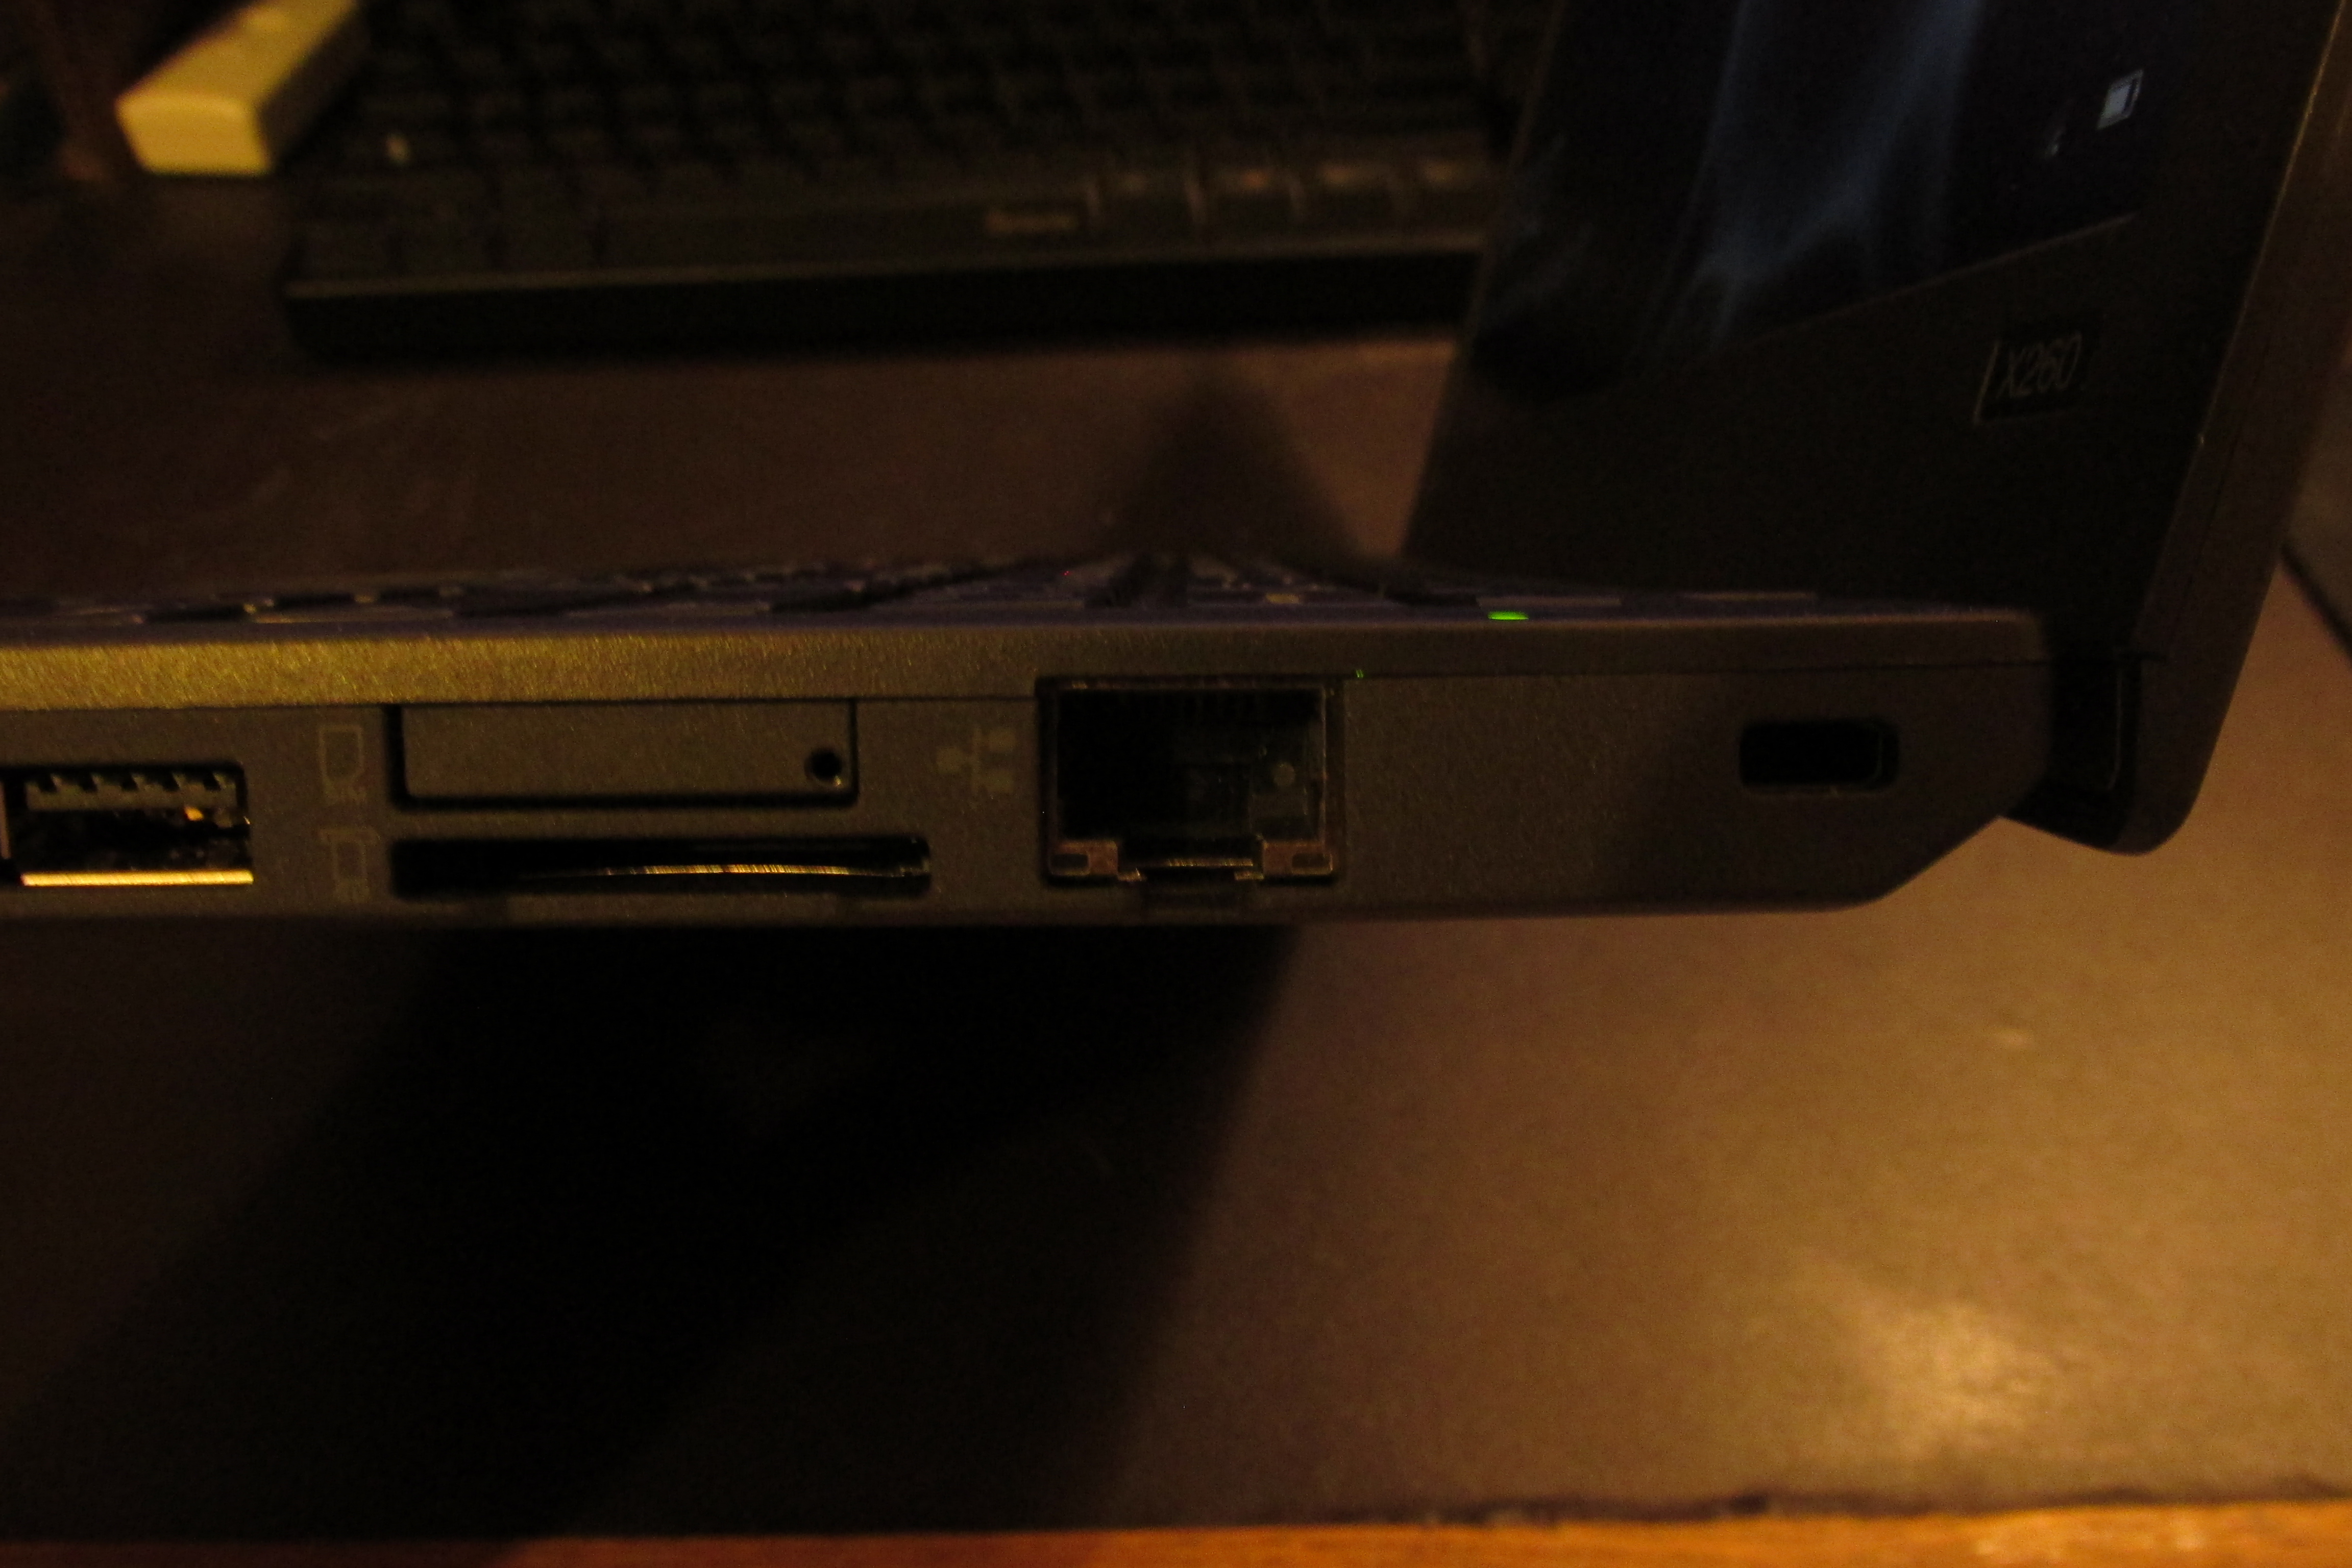
    • Built-in Ethernet.
    • No heavier than 3 Lbs.
    • Greater than 720/768 vertical resolution. Some WebGUIs I deal with are hard to navigate on lower resolutions.
    • Must fit in my beloved Macbook Air Wallet from Waterfield Designs. So not larger than about 12 in, depending on overall design.


    Turns out there are very few machines that meet all these criteria. The hardest thing is finding machines with built-in Ethernet that are not either bulky or cheaply built. Much less in the size range I needed.

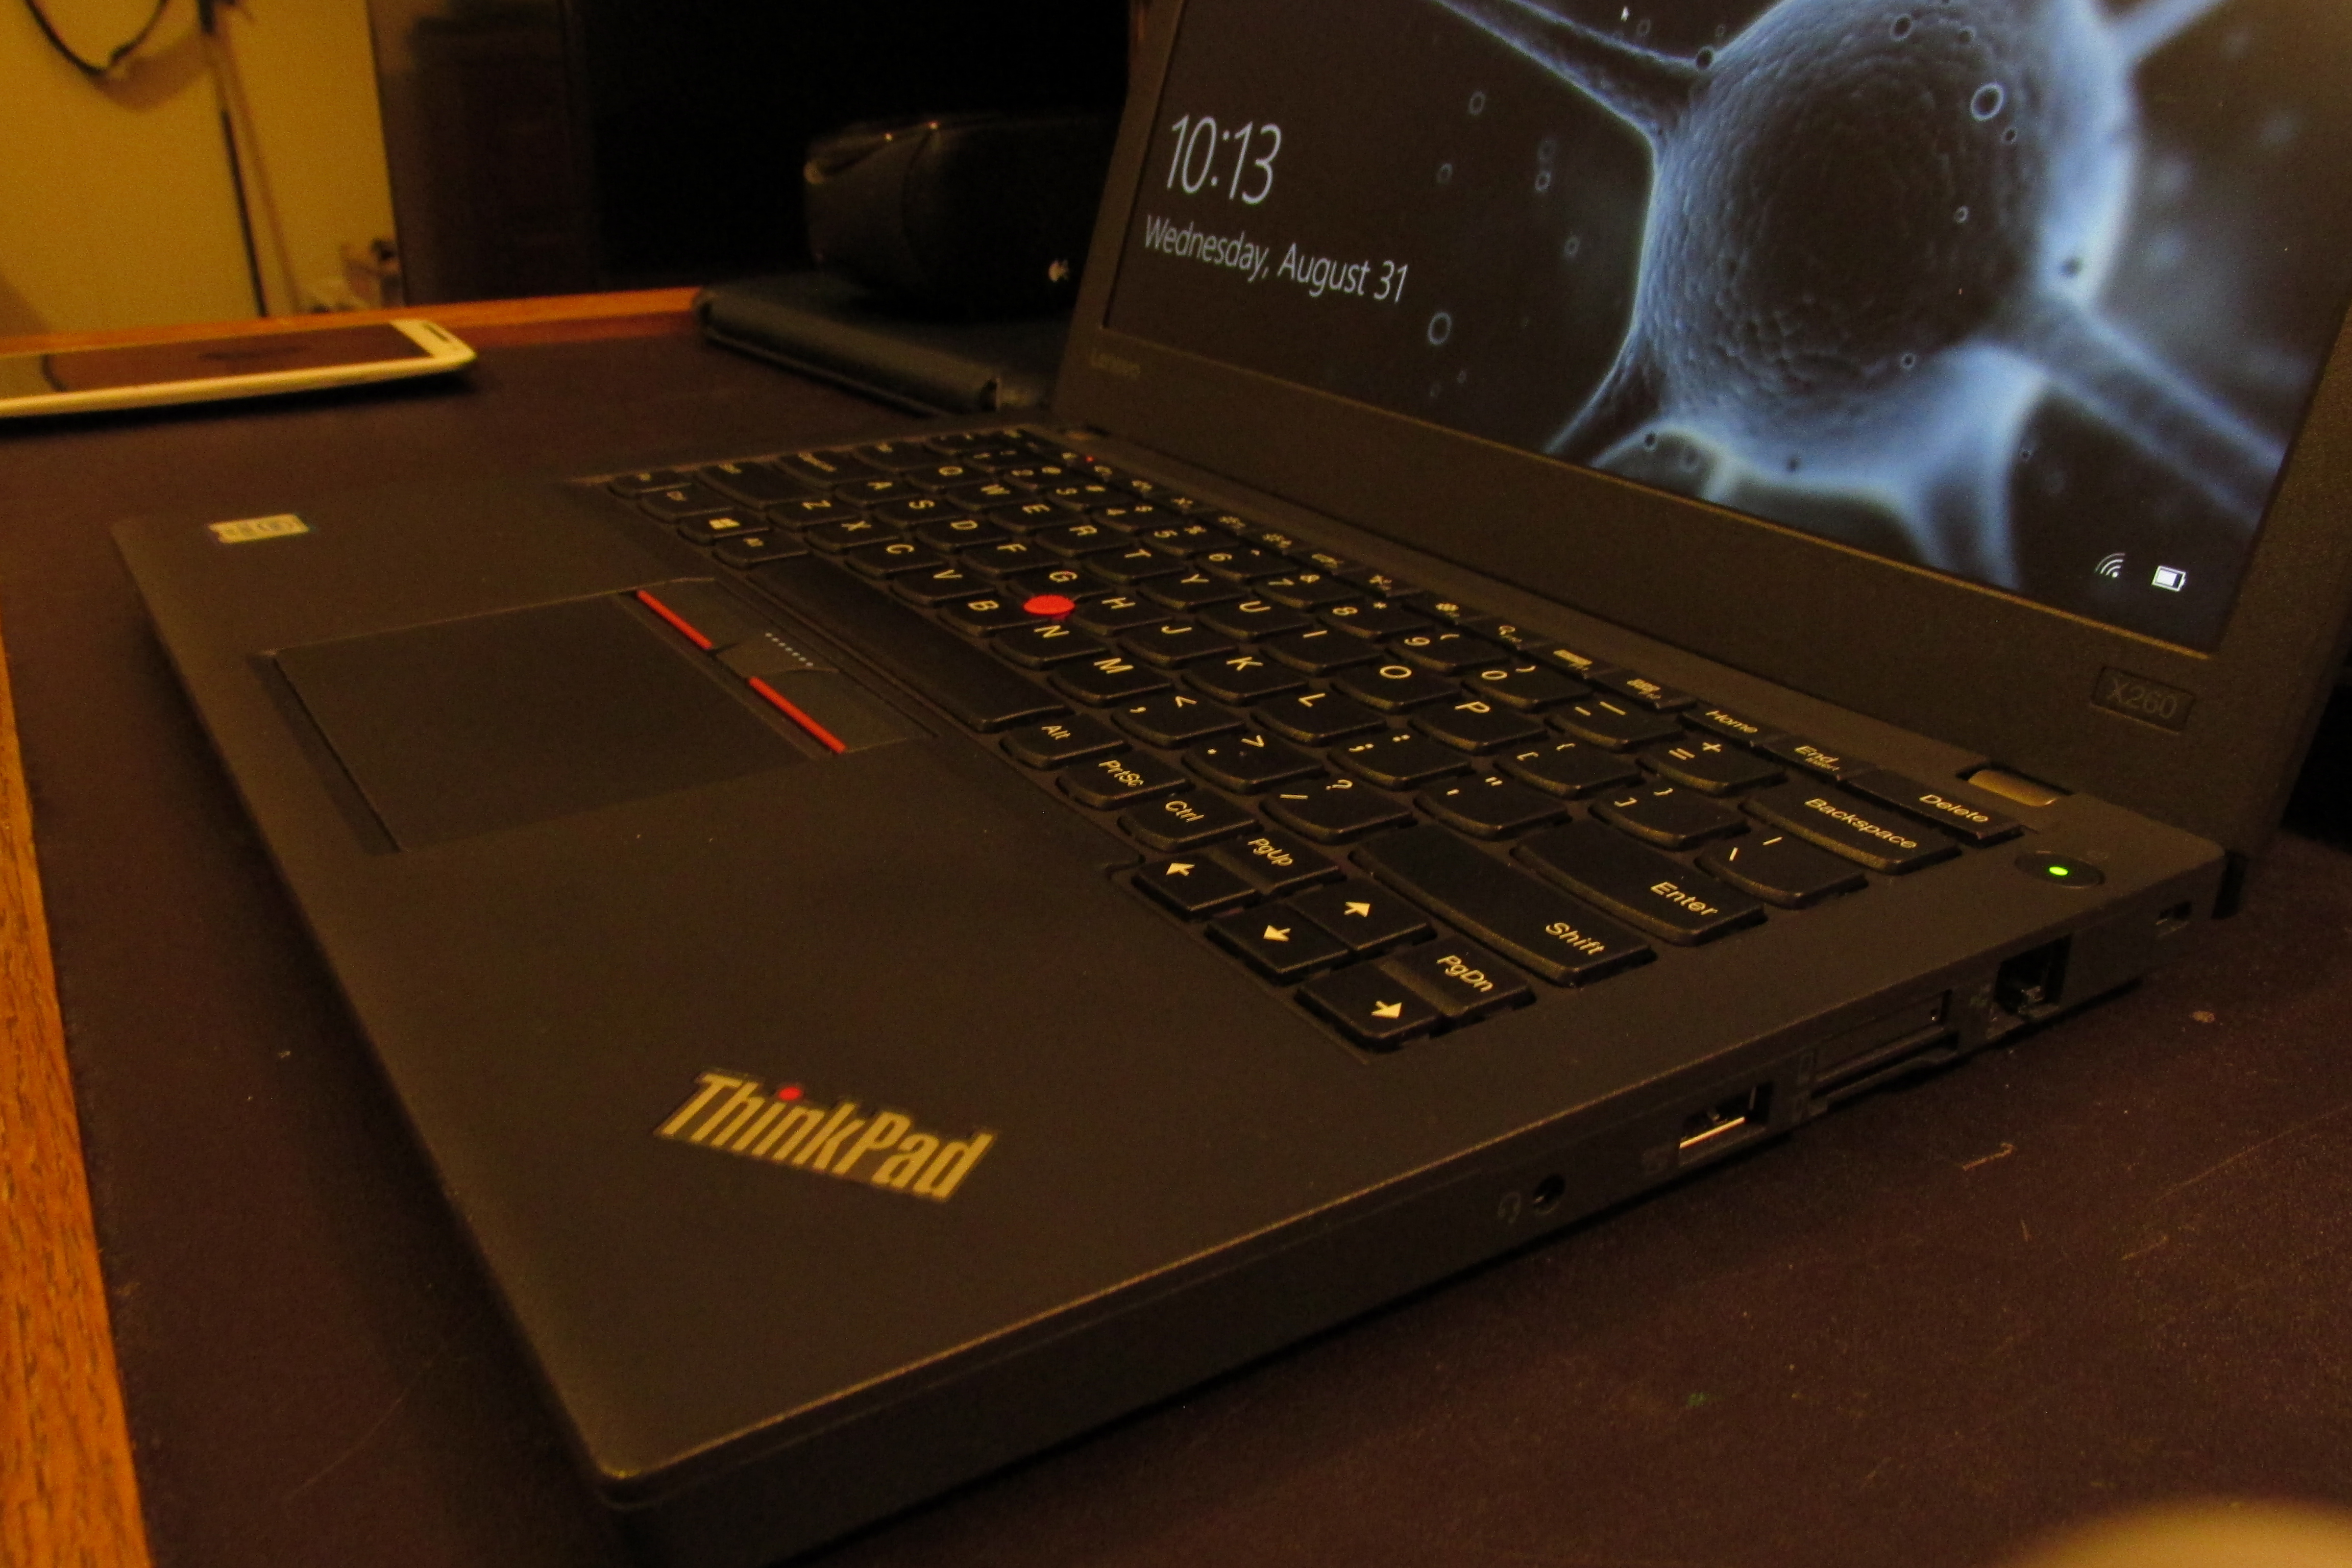
    After much searching, I ended up at a machine line that I had drooled over before. The Thinkpad X200 series. It just so happened that Lenovo was releasing the Skylake based X260 soon after I began searching early this year. Initially, they were only offering a 768p screen, I bided my time and eventually they opened up customization and offered 1080p IPS screens. So now it met all my criteria! I saved a little coin by not splurging on the SSDs that Lenovo offered and decided to install a spare ADATA SP600 I had from my TestCore turned FreeNAS.

    The configuration I decided on was:

    • Intel Core i5-6200U
    • 8GB DDR4
    • 12.5in FHD IPS Non-Touch Display
    • 500GB HD 7200RPM (replaced with the aforementioned SSD)
    • Intel 8260AC+BT 2×2 vPro

    Shock and Awe

    I have had a little hands-on time with IBM and Lenovo Thinkpads. I think the best way I could describe them is reliable and confidence inspiring. Even not knowing anything about all the work they put into making sure that anything with ‘Thinkpad’ on it will live up to that name…you can just tell that this machine is a tad better that the other guy’s. Some might question my decision to go Lenovo with all the spyware and security drama. Not to mention the fact that they are slowly running the Motorola name into the ground. Most of the drama was around the Superfish spyware that came bundled with the Ideapad line and never touched the Thinkpad line (Consumer vs. Business). That is just real poor decision making that every OEM has or is doing on some level. My doing a fresh install on the SSD solves all the crapware problems that one might find with any OEM. Then there is the Lenovo Service Engine drama that was blown way out of proportion. They were utilizing a method of installing support software via the BIOS that Microsoft provides in Windows. This software installs even on fresh operating system installs. Microsoft changed their policy on using this method after learning how fully OEMs were using this and Lenovo ceased doing it and release a patch to prevent it from running after install. This is similar to how connected Windows 8 and 10 are. How Microsoft wants feedback on everything people are doing with the OS. I understand the desire to want as much feedback as possible to improve your product and ensure returns on a very low margin business. These are multi-billion dollar companies. They do not care about your personal data. They just want to know if you tend to hit this button or that. Or how often you run a particular app and how you launch it. Sure we need to take them to task when we catch them being irresponsible with the collection of this data and Superfish was a huge overstep, but they have a legitimate claim in wanting an eye into the usage of these systems.

    Anyway, I was not deterred by the controversies surrounding Lenovo. And I am so glad I wasn’t. I love this machine. It serves my purposes so much better than the XPS12 ever could. It fits in my bag a tad better. It is lighter. It has physical mouse buttons. And most importantly…it has Ethernet.
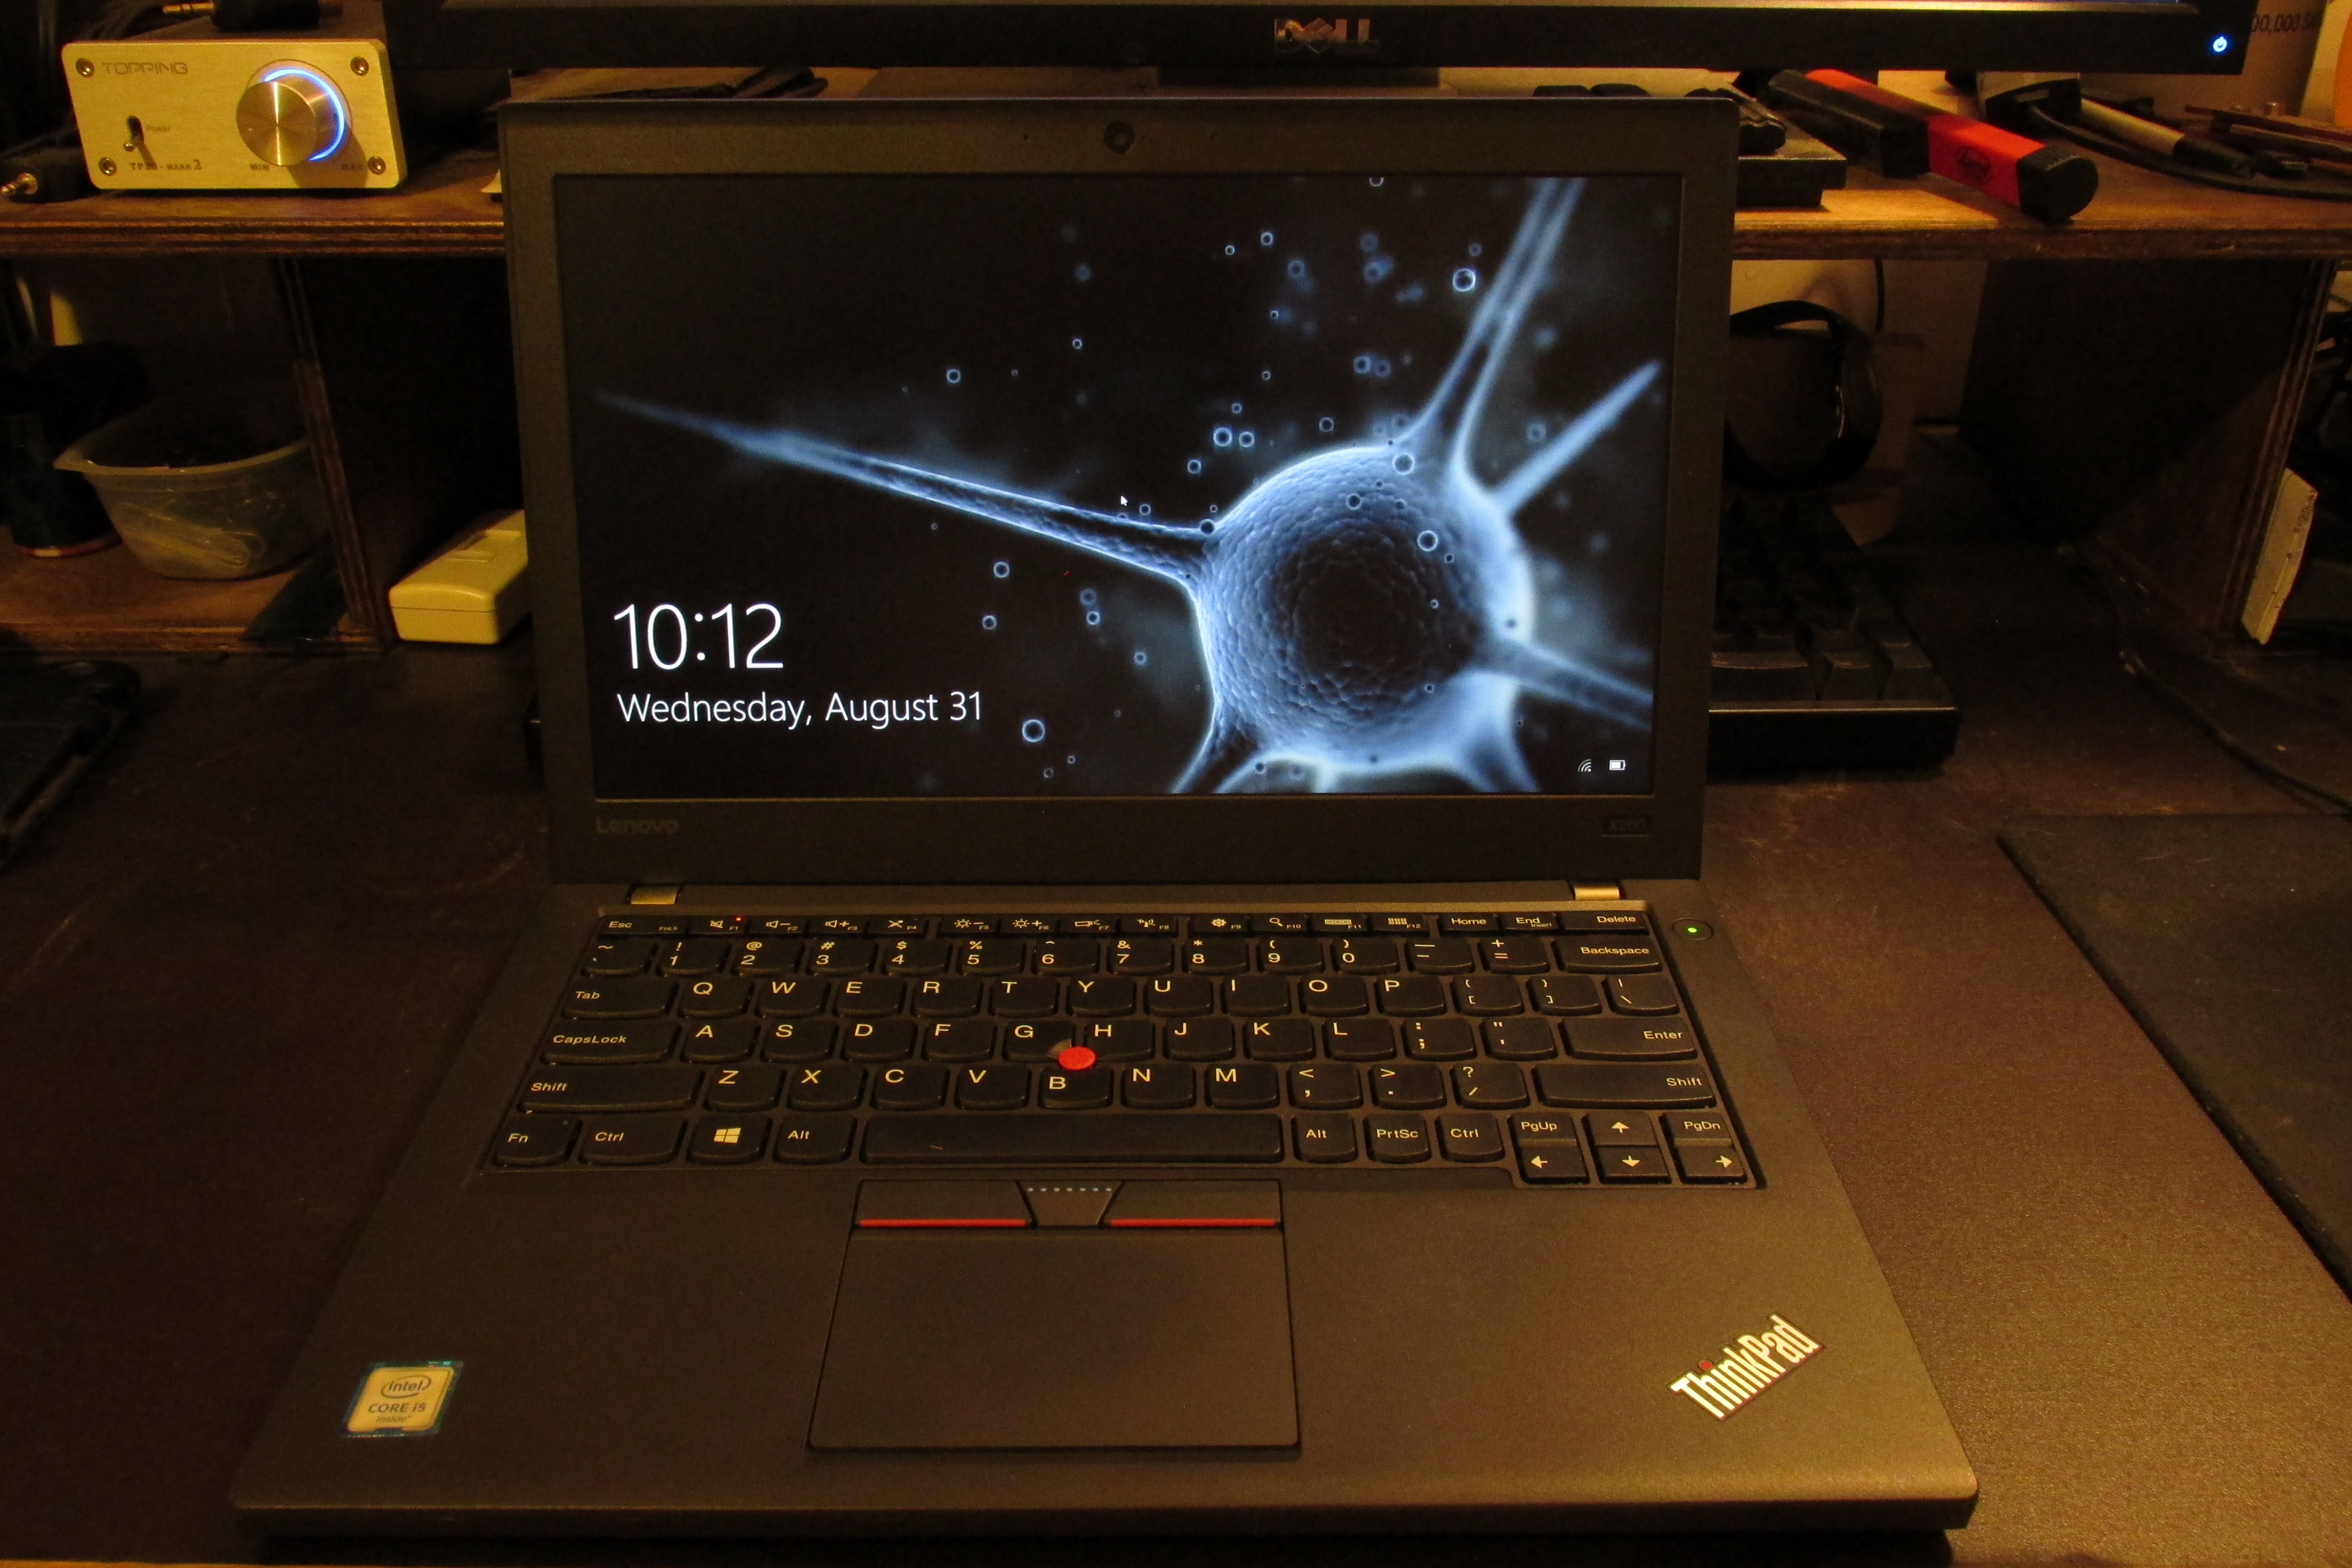
    IMG_0191

    Build Quality

    While it is not build as tank-like as Thinkpads of the past, it feels very solid and mine does not exhibit some of the QC issues that some on the Thinkpad sub-reddit had seen early on. Even after taking it apart to install the SSD, all the seams are tight.

    Keyboard

    The keyboard feels a tad better than the XPS12. I am not privy to the more luxurious notebook keyboards out there, and am not composing novels on it, so the keyboard is not a huge category. Of more concern is the actual keys available, and it is even better than the XPS12 in that department. Namely no need to hit function for Home, End, Page-Up, and Page-Down. And NO BACKLIGHT! I hate backlights on keyboards.

    Screen

    The screen is a 1080p semi-gloss IPS screen. It looks good and deters glare well enough. Much better than the glass touch-screen on the XPS12. The initial run of the XPS12 came with a really bad IPS screen that suffered from what appears as temporary burn-in. I see no anomalies with this screen at all.

    Touchpad/Nubbin

    The touchpad is the best Windows one I can remember using in recent memory. I think there was a nicer HP I worked on in the early Windows 8 era that might be the best ever, but I fail to remember the model. Another bonus is that it has physical mouse buttons. That is getting rarer and rarer on all but the clunkiest laptops. I am new to having the nubbin at my disposal. I always made a point to try it when I found myself in front of a Thinkpad or Latitude and could see the utility. I find myself using it about 20% of the time.

    Verdict

    So I guess you can tell I am very satisfied with this machine. It might not be the pinnacle of the Thinkpad name, but I think it carries the torch well in its own ways. It does come in at a much friendlier price point than if they had tried to build a tank. I think some of the material decisions and construction methods make for a rugged, yet unassuming package that suites its place in the modern PC market perfectly. And like most of this article rants on about…there just aren’t a lot of machines in this category and I think it is laps ahead of the competition.

  • From Test-bed to Data-dump

    From Test-bed to Data-dump

    In preparation for testing Windows 10 Betas last year I built a tester rig that was equipped enough to morph into a primary rig for someone or server of some type.

    • Intel Pentium G3258 (Unlocked Anniversary Edition)
    • ASRock Z97M-ITX/AC
    • 8GB DDR3 @ 1600MHz (2x4GB sticks)
    • ADATA SP600 128GB SSD
    • SeaSonic SSR450RM PSU
    • Thermaltake Core V1 Mini-ITX case

    Sure I could have just used visualization to test Windows 10, but I really wanted to see how it behaved when properly installed on dedicated hardware. And I wanted an excuse to buy more hardware. I did have some ideas for it’s implementation as a guest gaming rig or NAS or even selling it to a particular family member who never seems to want to pull the trigger on re-joining the PC Masterrace.

    Time to move on

    Well It has been a year and Windows 10 has officially rolled out. So the need for a test rig has passed. I could keep in on Fast-Ring builds and toy with them, but I really wanted the hardware put to better use.

    My need for real, dedicated local storage recently saw a sharp increase due to a few factors:

    • I am now re-ripping my music library to FLAC and would like have some redundancy in their storage.
    • I have subscribed to ITPro.tv and am able to download their lessons. I need more room for those if I plan to keep them for posterity.
    • I had my storage drive in my main rig fail. Which woke me up to pitiful state of my back-up strategy for a person as knowledgeable as I am.

    Shark-bit

    I have shopped around for NAS’s on and off for a long time now, but never could bring myself to pull the trigger. Each of the major machines in my house have large storage drives and the most important, not easily replaceable data is duplicated either by hand (for static data like ISOs) or through SyncToy (for dynamic data like game server back-ups). My personal data us handled by Jungledisk as a previous post details. But my need for a large amount of storage and fear of these drives failing escalated recently so I started looking really hard at my options. With the TestCore being freed up, I started leaning really hard toward turning into a storage box.

    And the best option I knew of for such a task was FreeNAS. I have actually played with FreeNAS in the past on a netbook. Just to see what it was all about. I had seen it mentioned quite a lot around the web, but it came to my attention for real when a large update to it making more n00b friendly had it being featured in many blogs and podcasts I frequent some time last year.

    So in light of recent events, I turned to it again. Got it installed and tested things out with the SSD I had in the box already. Everything worked marvelously. I just had one issue…The Thermaltake Core V1 is not a NAS enclosure. It has 2 3.5″ HDD mounts. A little Google-fu and I was lucky enough to discover the crew at HDCP unlocked some hidden flexibility of the Core V1 by mounting drives to the vent holes on the side panels. I was able to cram 4 3.5″ HDD’s and the SSD into that little case while still keeping my Cooler Master TX3 tower cooler. Due to large 200mm intake fan and relatively beefy CPU cooler it runs really quiet. Am running the case fan at a normal curve and the CPU on a silent curve as it won’t be all that busy and is currently not overclocked.

    Crowded yet cool interior.
    Crowded yet cool interior.
    A test fit of the hack with 2 random drives.
    A test fit of the hack with 2 random drives.

    I am technically not where FreeNAS likes you to be with my hardware. With my 12TB of storage they would prefer 12GB of RAM and ECC at that. I have regular non-error checking RAM and only 8GB of it. I am running the drives at ZFS level 2 so I can lose two drives. All that said I am not seeing any detriment to performance and with this box serving more as cold-to-warm storage I don’t think it will be too unhappy in the long run. I also have email alerts set up so I will actually know when things are wrong. Also got it set up on my pfSense box after setting up an account via this domain for them to use. And I do have it on a UPS (ZFS golden rule).

    After a delightful mix of need, inspiration, knowledge and ingenuity I have gotten a rather decent little NAS put together. It has been in 24/7 service a a little over a week at this point. And was in a couple weeks of testing prior to that. I have also been playing with jails and cementing my FreeBSD skills. I am familiar enough with it from my previous Linux experience and from playing around with the it in virtual machines a time or two. I also have some real experience with it in the form of my pfSense box which also runs on FreeBSD.

    And after all this I have some advice. Use FreeNAS wizards! They are there for a reason. I followed a myriad of tutorials on properly setting up CIFS(Windows) shares and they all had a mix of what was and wasn’t required and none of them allowed me to reliable access the share. I finally blew thing away and used the wizard and access has been seamless. Similar to certain tasks on the Sonicwalls at my job. Yeah, you can go change the 6 things there are to change to open a port and slam your head on the desk when it doesn’t work…or you can use the wizard have it actually work.

  • Zalman ZM-VE300 drive enclosure, miracle worker Review

    Zalman ZM-VE300 drive enclosure, miracle worker Review

    Of salt and memories

    Any geek worth his salt has had to boot a PC or a hundred from a USB flash drive to repair, recover, or re-install. Those that are REALLY worth their salt have put many a flash drive to pasture from repeated ISO unpacking. Being the resourceful geek that I am, I run around with a multi-boot utility on a flash drive that allows me to boot into any number or tools and operating systems. My utility of choice is YUMI. One drawback to it is that you can only have one Windows install available at a time, so I still abused the memory quite a bit due to my having to work with everything from XP to 8.1; throw in 32-bit and 64-bit variants and you have a lot of unpacking still. I solved this problem somewhat, by switching to a 500GB portable USB drive. A spinning disk can take the abuse much better and is actually faster for writes than the cheapo NAND and controllers you find in run of the mill flash drive. However, I found that many machines that I work with end up not being able to boot from my USB-HDD at all. I needed to find another way…

    Enter the Zalman ZM-VE300. It first came to my attention in a video covering Zalman’s booth at CES 2014. And a later review by the same people. It is no normal portable drive enclosure. The VE300 can emulate an optical disc drive (ODD) and mount one of any number of ISOs that you store on the enclosed hard drive. There are 3 modes to optimize for different use cases: HDD, ODD, and Hybrid. HDD mode makes it behave like any USB HDD and lets you access storage. ODD mode emulates an DVD/CD-ROM drive and lets you select an image to mount and boot/load. Hybrid mode exposes both ‘devices’ to the system. You select the modes with a jog dial the flicks up & down, and select items by pressing it in. There is a ‘Back-Up’ button that interacts with Zalman’s bundled back-up software and serves as a back button in menus.  The back-up software will not be discussed here as I have no need for in my use case of the enclosure. The ISOs are stored in the root directory of your drive in a folder that you label “_isos”. The rest of it can be used for whatever storage needs you have.

    IMG_0079_editedI will answer the burning question of whether the drive ‘does what it says’ up front…YES!. It has booted a number ISOs on a handful of machines that I tried it on. Only one PC failed to play nice with it; my old Dell e1505 laptop. It recognized something was plugged in, but complained that no OS was present. Every other PC loaded the selected ISO without any complaint. There is a trick to getting things going though. You need to enter either a boot menu or BIOS screen to allow the drive to be powered but idle. This is so you can select the correct mode and ISO to boot to. On most computers it is best to do this anyway rather than hope it is setup to boot willy-nilly from any random drive thrust into it. Once you have selected a mode and ISO you just select the Zalman from the boot menu or restart if you went to BIOS and maybe enter the boot menu if you couldn’t change the boot options to prioritize it. If all goes well, your selected ISO should load as if it was sitting in the disc drive. I opted for a Crucial M500 SSD to occupy my VE300 so this goes ridiculously fast. I chose an SSD to avoid moving parts. Memory wear will be minimal as I will not be using it for storage, only multi-booting. I still have the my 500GB portable drive for storage and recovery dumping.

    A grain of salt

    It wasn’t a painless endeavor turning this beauty into a multi-booting beast. Long story short, I had to end up pre- formatting the SSD before using it in the enclosure. A problem that might have been quickly solved by another man, but it took an off hand mention in a YouTube review/tutorial to guide me to the solution. Nowhere in the limited and highly visual manual or any other documentation did it mention that you might need to format your drive prior to insertion. This could be a big speed bump to even a slightly lesser geek that might lead them to believe they purchased either a bunk drive or enclosure. I will have to drop a suggestion Zalman’s way on filling out that manual a little. And if I am going to knock it on anything else…I think the dial needs to be rethought. It just feels chinsy and really cuts down on the fit and finish. I don’t see it standing up to too much manipulation, but I hope I am proven wrong. Some other reviewers might knock it for its interface, but I like the dead simple UI. Hard to get lost or screw anything up.

    2014-03-03 17.53.50_edited

    But you can never have too much salt

    With all that said…I freaking love this thing. It solves a huge problem that I run into repeatedly in my professional and private dealings with computer repair. Short of the odd PC that doesn’t play nice, it allows me to instantly boot any install disc or recovery tool or password reset or memory test that I need for a particular task. No more fumbling around getting the right assortment of install image and tools,; all the while eating through the life expectancy of my flash drives. I of course still carry a couple flash drive with a few select tools on them so I can leave them running for extended virus scans or SpinRite sessions, but the ZM-VE300 it never leaving my go bag.

    UPDATE (08/01/2014):

    Felt the need to reiterate how ridiculously useful the VE300 is. What blows me away more than anything is that this isn’t even a product category. It ,and it’s variants from Zalman, seem to be the only devices that serve as a virtual optical disc drive that mounts on-board ISO’s. There are no other such devices that I could find in my research. And it is not like they are perfect. There is the finicky setup and the industrial design could use a closer look. Sure, people aren’t demanding such a device, but I have never seen a device with zero competition. These facts don’t make me love the little guy any less, though. Since writing this review originally it has proven invaluable in cleaning, restoring, and troubleshooting a plethora of machines. Still a must buy!


  • Update: DIY Router/Firewall Project

    Update: DIY Router/Firewall Project


    Too Good to be True

    The whole ‘two machines in one box’ didn’t pan out in the long run. Not that it isn’t perfectly possible; just not on the sparse hardware I attempted to do it on. After a round of updates to both VirtualBox and Windows the network bridging voodoo failed and I could not get it working again. The BlackBox continued to serve as an always on file server and remote access box (mostly to start big downloads from work, Steam and ISOs).

    I was relegated to a Netgear WNDR3400 which eventually received an experimental DD-WRT install which solved a few of the issues I had with it. However, my patience worth thin with the horrible WiFi performance I got out of it and I retired it. It saw a spot of use as a client bridge. In the iterim I had replace my ailling Speedstream 4200 DSL modem with Windstream’s Segemcom F@st1704 modem-router combo (or RoMo as I have tried to term the devices). I lived with just the F@st1704 serving my network and it performed very well. I have used many of them professionally and am very impressed with their performance.

    Ch-Ch-Changes!

    http://www.pfsense.org/As great as the Sagemcom is it just couldn’t keep up once my brother and I got into some really twitchy online games. And it didn’t provide the management granularity I was starting to find use of. I decided to re-roll the BlackBox as a stand alone firewall as it was seeing almost no use anymore as an always on Windows box. After much research and finding the free version of SmoothWall wanting, I settled on PFSense.

    After a minor problem getting the install USB to boot properly, PFSense has been painless and powerful. Though getting forwarding rules set-up can be a tad misleading, it is not near as bad as the SonicWalls I deal with professionally. It has survived many black-outs and updates. I run it bridged of course. NAT would be impossible otherwise. I only have a handful of rules, but have had zero problems running anything from FTP to game servers. And I do get much better performance out of ping sensitive tasks over any solution since the virtualized SmoothWall.

    LargeGeek's little network.
    My small yet effective network closet.
  • Review: Ducky DK9008G2-A PBT

    Review: Ducky DK9008G2-A PBT

    If you have no idea what a ‘mechanical’ keyboard is and why it is a ‘thing’, I suggest you read through the rather thorough post at Overclockers.net before partaking of this article.

    I became aware of mechanical keyboards from a few hosts that appeared on a few different shows over on Cnet. One in particular would rattle on about how much more satisfying it was to type on them. Also the Das Keyboard was popping up around the web a lot. I do a good bit of data entry so made the appropriate mental notes incase I decided to one day make the ultimate workplace upgrade.

    Around that same time replaced my generic, OEM style keyboard with what I hoped would be a rather fruitful gaming keyboard in the Razer Lycosa. And for the most part it has served me very well over the past few years. It’s twitchy action and soft touch was a god send during my heavy World of Warcraft grind sessions. After years of abuse it is not cutting it anymore. The soft-touch key coating is worn, the backlighting is annoying, the touch sensitive media keys don’t work anymore, typing is utter torture, and the action does not measure up to what I have found mechanical switches can deliver.

    At some point not long ago gaming grade mechanical keyboards started entering the market from the likes of Razer and Corsair. This brought the mechs back to my attention. If the mainstream manufacturers think this is a thing, I need to pay better attention. I started doing my research and discovered all the information that is nicely summarized in the OC post. However, I could never really justify replacing my Lycosa as I am very on and off with gaming and don’t type enough at home to justify a new keyboard, much less mech that comes at a premium.

    My brother was doing similar research as I, and found he could justify replacing his generic Dell board. He went with the SteelSeries G6V2. After really getting a chance to poke at a mech in real life, I decided to start shopping. The SteelSeries uses Cherry-Blacks and I decided I liked them. I couldn’t imagine using the touchier Reds and knew I didn’t want the Browns or Blues that have the ‘snap’ action that makes typing so delightful, but is not as suited for gaming. I would have bought the G6V2 also if it wasn’t for one detail. Sadly, they decided to replace the left-hand Win-key with their function key. That is no good for me. I am a keyboard shortcut junkie and need that left Win-key (this will be even more important when Windows 8 takes hold). While shopping, I took a hard look at what I was replacing…what bothered me about the Lycosa. I made a checklist for what I wanted in my next keyboard:

    • Cherry-Black Switches: I had first person experience with them and had positive feedback from my brother
    • Durable keys: No soft touch keycaps. Maybe opt for premium materials.
    • No backlight: One more thing to break or wear out and possibly impact the functionality of board over time.
    • No bells and/or whistles: This is a feat in the gaming keyboard market as manufacturers feel the need to differentiate and do so by slapping whatever half thought out features they can to be distinctive.
    • Needs to LOOK like a keyboard: Like the above point, some makers differentiate so much that what started out as a keyboard ends up looking like something out of Dali’s nightmares.

    I found very few keyboards that met these requirements and had decent reputations. Since black switches are considered gaming switches, manufacturers feel the need to make flashy ‘gaming’ keyboards around them that take up extra space and have bonus features that get in the way and rely on proprietary software to function fully.

    I ultimately decided on the <<Ducky DK9008G2-A PBT>>(Ducky Website). And to really deliver on the durable key front, I went with the PBT over the traditional ABS as it is supposed to last much longer and the letters are laser etched into the plastic. While they decided to replace the ‘context menu’ button with their function button, <Shift + F10> works just as well. It requires no software other than the drivers that automatically installed when plugging it in to enable the media playback and shortcut functions.

    …I have actually lived with the Ducky for a while now as this post sat unpublished for a time… 

    I can say I love this keyboard. Rather than the Swiss Army Knife that most gaming boards tend to be, this is a samurai sword that is designed to do one thing and do it better than anything else. I find my hands are much less fatigued after lengthy gaming sessions and I dare say my Tribes game has improved slightly. While it has a modicum of extra features in the media controls and shortcut buttons, they do not get in the way and are not pivotal to the function of it. About he only thing I could possibly complain about, and this is a stretch, is that the laser etched PBT keys are a touch harder to read in low light and at certain angles. This problem is slightly exaggerated by my particular setup. My monitor sits on a custom riser that brings it far away from the board so there is little ambient light illuminating the board if  find myself forgetting to turn the light on. Again, this would probably be a complete non issue for normal people that don’t fear the light.

    I whole heartedly recommend the Ducky DK9800G2, and any Ducky for that matter. My only warning is to try and find a way to try out the different switches and come to a conclusion on which one is for you. In case you missed it I will forward you to the OC thread again to learn about them.

    And If you are wondering where I got mine, as they can be hard to find here in North America depending on current supply, I got mine from Tiger Imports. Price is what it is on theses things, but they shipped quick and kept me notified on order status well. Despite there being other sources for Ducky’s, Tiger Imports was the only one that I found to carry this particular model which suited my needs perfectly.


  • A ‘Not So Large’ Review: Logitech K400 Wireless Keyboard/Touchpad

    A ‘Not So Large’ Review: Logitech K400 Wireless Keyboard/Touchpad

    You might have seen my previous post referencing my desire for a new HTPC input device and how it might have been the Koribo. Well, I finally found a keyboard/pointing device combo that struck my fancy in the Logitech K400. In fact the K400 even looks like a pared down version of the Koribo. I had narrowed my list down to a handful of products, including the K400, and saw it was ~$27 at a ‘local’ Wal-Mart and decide to pull the trigger. It is usually listed anywhere from $30-$40 that I have seen online, so it was deal as well as the whole instant gratification factor.

    What it has to beat…

    K400 Compare
    K400 compared to old HP bundle

    The K400 is replacing the wireless keyboard & mouse that came bundled with the HP Pavilion Elite that serves as my HTPC/Living room gaming rig. I have suffered with using a full size keyboard and mouse with my set-up for over three years now, so any device that is remotely tailored to couch surfing should be an improvement.

    Does it measure up?

    K400
    Logitech K400
    K400 side
    Profile view
    K400 bottom
    Bottom-Rear view

    Yes! Even more than having both input devices in one, I really appreciate the smaller package. After finally getting my Roku2 programmed into my Logitech Harmony One remote, I am down to just having  the One, K400, and a PS3 controller on my small coffee table. I am not going to bother going into depth about keystroke performance or touchpad responsiveness, as this device is not designed to meet any demands other than just working. That said the few bonus features that the K400 have are a welcome addition. The volume controls work with my Windows 7 install (the HP’s media controls never worked with Win7, but did with Vista). The two-finger scrolling works fine. The precision on the touchpad is pretty good and I have no problems hitting the smallest of interface elements. While the keyboard is a little claustrophobic, it is more than adequate for entering URL’s and the odd network address when my media server acts up. You don’t buy this kind of device for composing novels as some reviewers on some of the shopping sites I frequent did.

    But LargeGeek, Is it for me?

    If you are looking for a decent wireless keyboard & mouse combo for a HTPC or other low input demand machine, the K400 is for you. If typing performance or pointer precision is imperative for any reason, you should have never ended up with the K400 on your radar, silly.

    An Update Nobody Asked For

    As of February 2018 there is still no beating the K400 for a living room environment. We are on our second one and was almost on our third, but it survived the coffee just fine after a quick disassembly.

    Links ‘n such:

    Logitech K400 product page

    Fun-fact: You might wonder why local above was in quotes. Local around here is a relative term, as I live in small town Texas and have to drive at least half an hour in any direction to hit civilization. I’ll debate the term civilization with you another time.


  • Koribo. I might have found my HTPC input device, but there’s a catch.

    Koribo Leira
    Koribo Leira — Credit: Koribo.com

    PC Perspective posted a link to a review at NeoSeeker of a few of Koribo’s products that intrigued me greatly.  (more…)

  • GTX 470…getting with the times

    image

    My only Black Friday purchase was picking up one of these from NewEgg for less than a 1GB GTX 460. Got it installed in my i7 rig and it is blowing away my entire collection. I also picked up a cache of games from Steam for a steal including Metro 2033 and Dirt2. Haven’t download them yet, but will post results when done.

    Now to fix familial internets…my cousin’s net is down.

  • DIY Virtual Router & Server

    The BlackBox

    Conception

    I recently decided to finally install a wired network in my house after suffering the faults of WiFi. I had considered buying a new WiFi router, but nearly every single router I looked at had its bad reviews. It was around this time I decided to wire up the place and caught  a couple episodes of Hak 5 (718, 720) that tickled my fancy…Build my own router. The concept never made sense on my strictly wireless network, but everything came to a head at the same time and I was obsessed. I held off on completing my main rig by finally getting a real graphics card in order to complete this project without braking the bank.

    Fleshing it out

    After much experimentation and deliberating, I decided the easiest and most useful set-up (for me) would be a Windows 7 rig running the firewall OS in VirtualBox. All my PC’s run Windows 7, so it only makes sense for my server to run it. Why go through the hassle of getting  Linux distro to play nice when a Win7 box will just work. And as for the firewall software, I decided on SmoothWall for now. I had originally tested Untangle, but could not get it running efficiently in a virtual machine.

    Hardware

    The whole rig was purchased for just over $300 after shipping from NewEgg.com. This router will only have to support me and my brother on a regular basis and every now and then a guest’s computer or one that I am working on on the side. If I had it to do over, I might get a processor that explicitly supports visualization, but this gets the job done.

    Rig Done
    After a little cable management
    mobo_top
    Mmmm…brains!

    Realization of Virtualization

    After much research on the overwhelmingly confusing topic of visualizing a firewall, I stumbled upon this incredibly helpful post. And after much experimenting, I finally managed to get SmoothWall running and routing while virtualized in Win7. My area of expertise is mainly in hardware and desktop support and any networking knowledge I posses is due to what I have had to learn to get by. Throw my lack of network experience in with trying to apply it to virtualization and bridged networks and you get a very frustrated geek. I should say that most of my frustration was with trying to optimize Untangle before I gave in and went with SmoothWall.

    The trick was setting the dummy IP address on the RED NIC (network port that connects to the modem) in the host OS. It was a detail that kept overlooking in the link above. And was also something that I didn’t really see reference to on other similar tutorials. You then assign the GREEN NIC (network port that connects to the rest of your network) in the host OS to DHCP or the appropriate static IP.

    After getting the firewall working, I did get the host OS onto my workgroup and sharing a storage folder. I even got VNC working after getting around some of the problems that it has on Win7. So now I can manage it headless. I also found a great little application for running Virtual Box VM’s as a service at boot-up that is dead simple to set-up and is working like a charm.

    Results…or Was it all worth it?

    Yes! Now your mileage may vary, but I am seeing great speed and performance increases. My subscribed DSL speed is 6Mbps and really never had issues with getting that speed on my old Belkin router. I did however have problems that required my restarting it at least once an evening. Which was one of the factors driving this project. With the my new custom rig I am now seeing regular speeds of around 6.5Mbps and even see some steady 8Mbps speeds in some Steam downloads. These kinds of improvements might seem ridiculous, but I am not really surprised. I live in a small town and live just outside the city limits. And I can imagine that Windstream (my ISP) is pumping out a healthy signal to get as far out in the boonies as possible. There are also relatively few subscribers between me and town. So my more powerful router is just taking advantage of every bit it can. I have also not had to restart any part of the machine after the initial setup process and boot-up testing. So yes it was all worth it.

    ip map
    An IP map that I made in Visio to make is make sense to me.
  • ASUS, my hero.

    PC Perspective recently had a post about ASUS’s forthcoming ATI Radeon 5870 based ARES cards. And I am excited!

    Where the 5970 is essentially two 5850’s on one card, the ARES is two overclocked 5870’s on one card. WANT!